Painted Harvest – CASE the Catalog

Greetings my friends and fellow stampers.  My apologies for not sharing a new project with you yesterday.  I spent most of my day tending to those unpleasant matters one must deal with when they are no longer employed (COBRA insurance, unemployment, etc.).  But I am happy to say that I have taken care of all of that business and I can now give my pre-order products the attention they deserve.

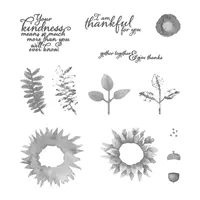
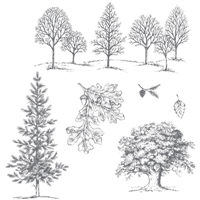
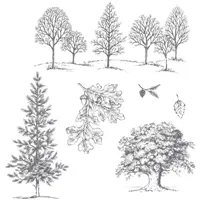
My first project I will share with you using my pre-order goodies will help prepare you for the upcoming Fall season (although here in Texas we do not really have such a thing – we pretty much go from hot Summer to freezing Winter seemingly overnight in early November).  The stamp set I used is called Painted Harvest and makes some beautiful sunflowers as you will see below.

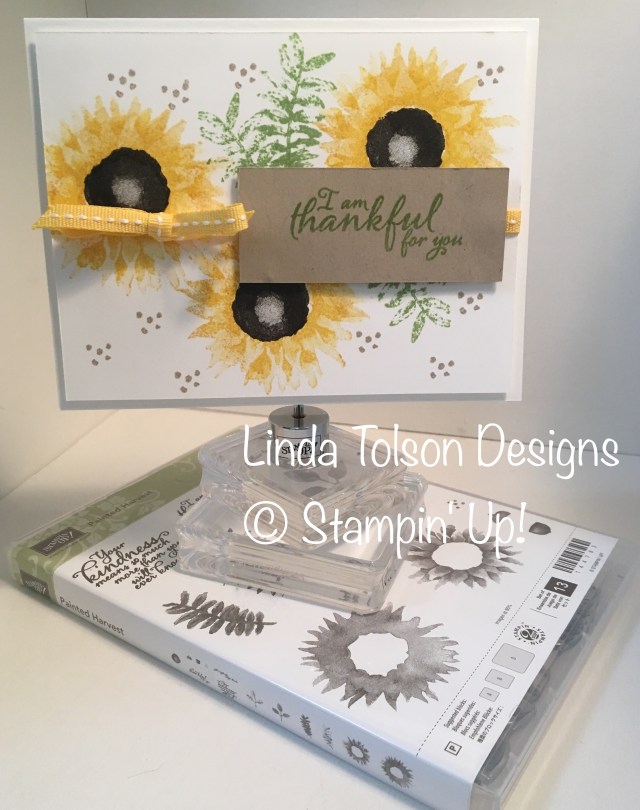
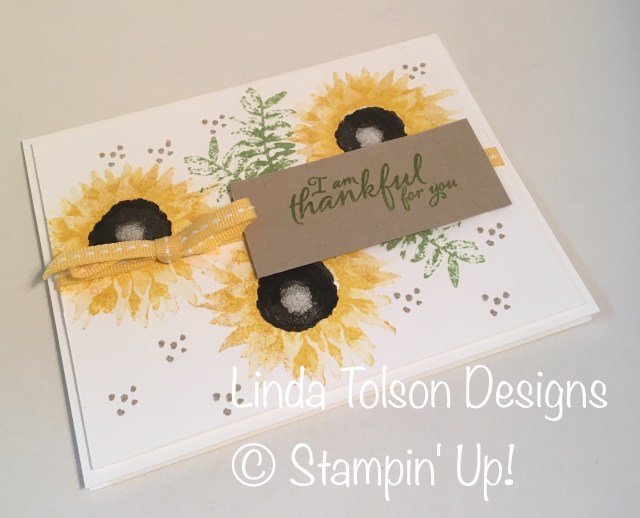
I did not have to put any real thought into the design of this card – I simply CASEd (copy and share everything) the card from page 48 of the Holiday Catalog (it’s not just a catalog, it is also filled with project samples to help motivate your creativity).  It is listed as a “quick & easy” project and it truly was quick & easy.

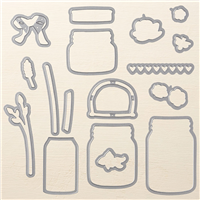
The Painted Harvest stamp set is offered in the Holiday Catalog as a “bundle” with a 3-leaf punch that coordinates with two of the leaf images in the stamp set.  When purchased as a bundle, you will save 10% off the cost of both items if you purchased them separately.

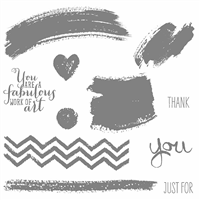
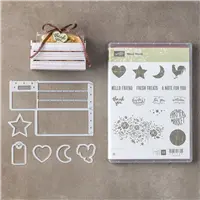
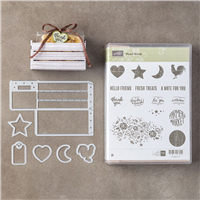
Below are the Stampin’ Up! products that I used in the design of my card, all of which can quickly be added to your shopping cart by clicking on the thumbnails:

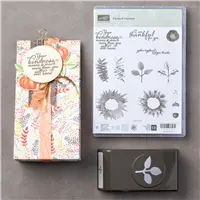
* Painted Harvest Stamp Set and Bundle will be available for purchase on September 1, 2017.

PAPER PUMPKIN PROMOTION – LIMITED TIME OFFER:

Have you thought about subscribing to Paper Pumpkin but never clicked the Subscribe button?  Are you not ready to turn stamping into a full-time hobby, but would love a simple, fun creative experience?

If you answered yes to either of the above questions, then now is a great time to  to join Paper Pumpkin at an amazing introductory rate during our Fall into Savings promotion.

If you subscribe from August 11–September 10, you will receive September’s (gorgeous!) Paper Pumpkin kit straight to your door, complete with everything you need to make adorable, shareable projects—all for 50% off!  Just sign up using promo code HALFOFF0917 at paperpumpkin.com by September 10.

So don’t wait!  Subscribe anytime from August 11–September 10 to get September’s kit at an outstanding introductory rate.  And shhhh . . . you won’t want to miss out on October and November’s kits, either!  Think: super cute and VERY festive!

The Fine Print:

  • Only new month-to-month subscribers qualify for the 50% discount.
  • To participate in this promotion, subscribers must join by Monday, September 10, 2017 at 11:50 PM (MT).
  • The 50% discount only applies to the new subscriber’s first kit.  After that, the price for each month’s kit will return to the regular price of $19.95 USD until membership is cancelled.
  • New subscribers must visit paperpumpkin.com to join.
  • Enter the promo code HALFOFF0917 at paperpumpkin.com to subscribe.

Plus, when you become a Paper Pumpkin subscriber you will gain access to blogs and Facebook groups dedicated to projects using the monthly kits.

HOLIDAY CATALOG SNEAK PEEK:  Today’s sneak peek video features the Merry Little Christmas Suite (a “mega” suite).  Why is it a mega suite?  Well after watching the video you will see it is not just any ordinary product suite.

Some of these products did make it into my pre-order so look for projects featuring them coming soon.

Thank you for stopping by today.  I hope you leave here inspired to put stamps to ink to paper.  Until next time, stamp on my friends.

Linda

Posted in Bundles, Cards, Paper Pumpkin, Products, Promotions, Thanksgiving | Tagged , | 6 Comments

Jar of Love in Color Theory

My pre-order for the Holiday Catalog arrived today.  I have shown great restraint – I have yet to open it.  Instead I finished a project that I had started yesterday that was a special request from a friend for her mom.  This is the project that I will be sharing with you today.

I purchased the Jar of Love bundle from the 2017 Occasions Catalog and again did not have much opportunity to play with it.  Once again Stampin’ Up! rescued me by carrying these two products – the stamp set and the coordinating framelits – over to the 2017-2018 Annual Catalog!

Below are the Stampin’ Up! products that I used in the design of this card, all of which can quickly be added to your shopping cart by clicking on the thumbnails below:

Price: $110.00

Tips & Tricks:

Jar:  You will need to be careful and use a steady hand when stamping the jar image onto the window sheet, otherwise your stamp will slide and the image will smear.  You will also want to allow the stamped image to dry (preferably overnight) to avoid smudging or transfer of the ink.

Water:  I stamped the water on a piece of vellum two times (for a deeper pool of water) and then stamped with a dry stamp several times to blend in the line between the two stamped water images.  I then fussy cut the vellum piece and attached in the inside of the jar with mini glue dots in all 4 corners (liquid glue will not work).

Flower Stems:  I stamped and cut out with framelits both the stems with leaves and without leaves.  Since I chose the tallest of the jars, the stems need to be made longer; cut and piece to desired length.  I then used glue dots to arrange them in a way that they would “fit” inside the jar once it was placed on top.  I attached the bundle of stems to the card front with a glue dot in the center of the stem bundle.  I then attached the jar to the top of the stems with glue dots at all four corners and one on each side in the middle, all on the very outer edge of the jar so they are not visible.

Ribbon & Bow:  I stamped the “burlap” stamp in Real Red and fussy cut it out, and then cut the width in half to make it closer in appearance to the width of the bow.  Again, attached with glue dots.

Shelf & Doily:  The Wood Textures DSP strip is intended to represent a shelf or table top.  I cut a doily in half and folded a small portion of it behind the DSP to keep it firmly in place.

Flowers:  You will notice that the stamp for the little flowers has a tab – the framelit has a matching tab.  As long as you match those two tabs up when cutting out the stamped flowers, you will get a perfect cut every time.  I have learned it’s easier to just ink up that tab and stamp it too since you are going to be cutting out the flower anyway – it erases all doubt of where that little tab was.

If you have any other questions regarding any of the design elements of this card, just ask me.

Now you know as soon as I press the “publish” button on this post I am going to tear open the box of my new toys, but before I do so I wanted to share another product video with you from the Holiday Catalog.

HOLIDAY CATALOG SNEAK PEEK:  Today’s product bundle is Smitten Mittens.

Smitten Mittens … kittens … oh my.  I have a surprise for you coming soon.

Thank you for stopping by today.  I hope you leave here inspired to put stamps to ink to paper.  Until next time, stamp on my friends.

Linda

Posted in Birthday, Cards | Tagged , | Leave a comment

Santa’s Sleigh with Decorative Mask Clouds

Moving on to some Christmas themed cards, I pulled out two of my products that I just had to have from last year’s Holiday Catalog that I never got the opportunity to play with – thankfully they were carried over to the Annual Catalog!

First, this is a non-standard sized card.  It measures 8.5″ x 4.5″ when closed so I will need to make an envelope for it if I wish to send it out.  But I am thinking I may turn this design into wall art … just need to find some frames that will work.

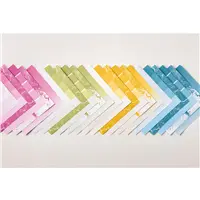
What I loved most about this bundle when I saw it was the sleigh.  You can stamp the sleigh image and then cut it out with the coordinating framelit.  There is also a filigree piece (shown in the gold foil paper on my card) to add extra pizzazz to the sleigh.  So many possibilities.

For my sleigh I stamped the image in Memento Black ink on a piece of the Wood Textures Designer Series Paper and then cut it out with the framelit.  I could still see some of the brown from the designer series paper on the sleigh runners so I got out my Basic Black Stampin’ Write Marker and colored in the runners which gave it an even richer look.  I then cut out the filigree piece in Gold Foil.

I made the mounds of snow from cutting pieces of Whisper White card stock free-hand.  It is not easy to pick up in the photos but I coated the mounds with Clear Wink of Stella so they shimmer when the card moves.

In the upper portion of the card I used the clouds mask from the Pattern Party Decorative Masks (intended to be used with the embossing paste) with Clear Wink of Stella to create a random pattern of clouds that shimmer as well.

The sleigh and reindeer are attached using dimensionals.  I used mini glue dots for the items in the sleigh.

Below are the Stampin’ Up! products that I used in the design of this card, all of which can quickly be added to your shopping cart by clicking on the thumbnails below:

Price: $110.00

If you have any questions about any other design elements of this card, please do not hesitate to contact me.

HOLIDAY CATALOG SNEAK PEEK:  Here is today’s sneak peek video of a new product bundle – Snowflake Sentiments:

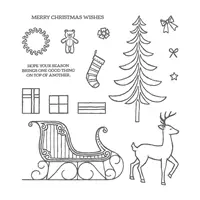
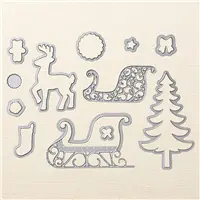
This bundle also did not make it onto my pre-order; however, after seeing the projects in this video I am having buyers remorse and wish I had included it as well!

Thank you for stopping by today.  I hope you leave here inspired to put stamps to ink to paper.  After all, it’s never too early to start working on your Christmas cards!  Until next time, stamp on my friends.

Linda

Posted in Cards, Christmas | Tagged | Leave a comment

A Daisy (Punch) in the Negative

Do you see art in things that others would consider to be trash?  I absolutely do.  I have always held on to my tiny scraps of card stock and designer series paper, including the “negative” pieces from punches and die cuts – you just never know when the need for that perfect size or shape will come around.

If you have been following my posts for the last few days, then you know I have been using the Daisy Delight bundle.  When I was punching my daisies for yesterday’s project combo, I fished out scraps of card stock from my Very Vanilla stash and most of the pieces were squares perfectly sized to fit nicely into the punch.  I set the negative pieces aside and they caught my attention when I was mentally creating my next card design.

I cut a piece of Delightful Daisy designer series paper slightly smaller than the Very Vanilla negative piece and attached them together with dimensionals.  I created the border of designer series paper by weaving 1/2″ strips of the same designer series paper (flipped to the opposite side for contrast).  The daisy block is attached to the front of the card with more dimensionals.  The most time consuming part of this card was the weaving; otherwise, this was a quick and simple card.

Below are the Stampin’ Up! products that I used in the design of this card, all of which can quickly be added to your shopping cart by clicking on the thumbnails below:

If you have any questions regarding any other design elements of this card, simply leave a comment or email me.

HOLIDAY CATALOG SNEAK PEEK:  Here is another product video from the Stampin’ Up! corporate office introducing you to another product from the upcoming Holiday Catalog – Quilted Christmas.  This is a product “suite” so be prepared to be amazed!

This one did not make it onto my pre-order, but I highly anticipate that it will end up in my collection sooner rather than later.

Thank you for stopping by today.  I hope you leave here inspired to put stamps to ink to paper.  Until next time, stamp on my friends.

Linda

P.S.  Coming tomorrow – Christmas cards and 3-D projects!

Posted in Any Occassion, Cards | Tagged , | Leave a comment

Daisy Delight and Wood Words in a Crate

Welcome friends to day two of my Daisy Delight showcase.  I created two projects to share with you today – a card and a collection of notecards that you could keep for yourself or give to someone as a gift.

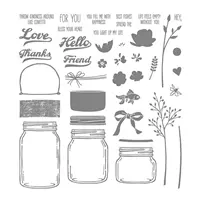
As I mentioned I would in yesterday’s post, today I used the coordinating stamp set with the daisy punch which gives the daisy an entirely different look altogether.  I sponged the lower portions of the petals.  I also curled my petals slightly different on these two projects – instead of curling both layers forward, I curled the bottom layer downwards.  There are so many different things that you can do with this bundle that give you seeming endless options.

For the notecards in the wood crate, they are 3×3 and there are 6 notecards in total (2 each of 3 designs).  I made envelopes for them with my envelope punch board.

Below are the Stampin’ Up! supplies that I used in the design of the CARD, all of which can quickly be added to your shopping cart by clicking on the thumbnails below:

And below are the Stampin’ Up! supplies that I used in the design of the CRATE, again all of which can quickly be added to your shopping cart by clicking on the thumbnails below:

Price: $110.00

If you have any questions about any design elements of these projects, do not hesitate to contact me.  If you would like to gather some friends together and make these projects, let’s talk about arranging a time and place and whether you would like to host a work shop or if you want to have a product-based class.

HOLIDAY CATALOG SNEAK PEEK:  Here is another product showcase video introducing one of my favorite product bundles (it’s in my pre-order!) Ready for Christmas:

My pre-order shipped today – I can’t wait to get my hands on this bundle!  You will be able to purchase one for yourself starting September 1 (unless you decide you must have it now and sign up to be a demonstrator like me – just ask me how!).

Thank you for stopping by today.  I hope you leave here inspired to put stamps to ink to paper.  Until next time, stamp on my friends.

Linda

P.S.  Don’t forget to #MakeACardSendACard

Posted in 3-D Projects, Bundles, Cards, Products, Thank You | Tagged , , , , | 2 Comments

Daisy Delight and Special Celebrations

I started writing a new chapter of my “life” last Thursday when I said goodbye to my friends and co-workers at Rosewood Hotels and Resorts.  While I try to decide in which direction I want to go from here (do I really want to return to a law firm environment, maybe work contract for a while or get really serious about what I truly love doing and that is being a creativity coach), I am looking forward to sharing this exciting adventure with you all, by simply sharing just one post or project at a time.

Good news I can share is that the Daisy Punch is back in stock (it is breaking all kinds of sales records as far as punches go at Stampin’ Up!) and I used this bundle in the design of my card today.

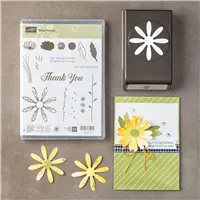
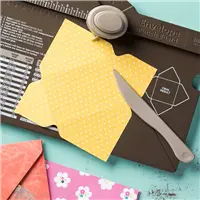
I elected to make my daisy using the punch on its own.  But never fear, I will make more projects using the coordinating stamp set this week so you can see the texture you get when using these two products together.  This project was “quick and simple” and does not require a Big Shot!

Below are the Stampin’ Up! products that I used in the design of this card, all of which can quickly be added to your shopping cart by clicking on the thumbnails below:

HOLIDAY PRE-ORDER:  A perk of being an independent Stampin’ Up! demonstrator is the “pre-order” period before each new catalog goes live.  The pre-order period for the upcoming Holiday Catalog started on August 1.  I just placed my pre-order and cannot wait to share projects with you soon.  It’s another great catalog full of amazing products.

NEED A HOLIDAY CATALOG?:  If you have placed an order through me within the last year, you will automatically receive a copy from me by mail.  If not and you would like to receive a copy, I will be able to distribute copies towards the end of August.

Until then, here is a sneak peek of one of the product videos from the Stampin’ Up! home office:

Thank you for stopping by today.  I hope you leave here inspired to put stamps to ink to paper.  Until next time, stamp on my friends.

Linda

Posted in Birthday, Bundles, Cards, Products | Tagged , , | Leave a comment

Ribbon of Courage – Prostate Cancer Awareness

I am sharing with you today my final card (for now) of my cancer awareness series that I made in honor of friends and family recently diagnosed with different types of cancer.  This particular card is for one of my brother’s-in-law, Wayne.  He lives in Wisconsin with my husband’s sister and sadly we don’t get to see them very often.  If I couldn’t be there in person to give them both a hug, I want to at least make them a card to let them know how much they are loved and are in our thoughts and prayers.

Making a masculine card is very difficult for me to do.  I lean more towards lace, flowers, glittery things, bows and so on.  I started with the color for prostate cancer awareness which is a light blue and just let my creativity flow from there.  Here is my card.

I ran out of Crumb Cake card stock (oh the horror!) so I used the blue as my base.  I had just enough Crumb Cake pieces to get a mat in there.  At first I was just going to do the one blue swirl, but that left too much white space and then this idea hit me.  Fortunately I had just enough Crumb Cake left to cut one of the swirls with my thinlits.  (BTW Crumb Cake outage has since been resolved; a fresh supply arrived on Wednesday!)  The t-shirt cut-out is from a retired set of framelits that were in the 2017 Occasions Catalog, but it was the perfect finishing touch that this card needed.

Here are the Stampin’ Up! supplies that I used in the design of this card, all of which can me quickly added to your shopping cart by clicking on the thumbnails below:

(Oops — I actually used SOFT SKY instead of Pool Party.  I don’t want to redo the supply list so let me know if you need any product numbers.)

If you have any questions regarding the design of this card, Stampin’ Up! in general, how you could join in on the fun and become a demonstrator or need help with a particular project you are working on, just give me a call or drop me an email.  I am here to help.

Thank you for stopping by.  I hope you leave here inspired to put stamps to ink to paper.  Until next time, stamp on my friends.  (Coming soon — cards and other project ideas using the extremely popular Daisy Punch which should be available for purchase (again) any day now!)

Linda

P.S.  Have you joined the “MakeACardSendACard campaign yet?  What are you waiting for?

Posted in Cancer Awareness, Cards | Tagged , , | Leave a comment

Ribbon of Courage – Thyroid Cancer Awareness

Wow where has the time gone?  This past week or so has been a blur.  I found out that my “9 to 5” job was ending on July 27 as the position was finally transferring out to California (a year in the making, but I had very little notice that the time was so near).  This is good news and bad news.  Good news is I will have more time to spend in my craft room creating cards and other items to share with you all (and have time to get them posted here for you to see them).  Bad news is I lose my primary source of income which limits how much I can spend towards new Stampin’ Up! products, but the worst yet is that I lose my health insurance as of July 31.  But to continue on this discussion would lead me to talking politics and that’s not what this blog is all about.

In keeping on with my cancer awareness like for breast cancer projects, I am sharing with you today a card that I made for someone that I went to high school with who was recently diagnosed with thyroid cancer and has already undergone surgery to have her thyroid removed.  The cancer awareness ribbon is a tri-color ribbon (pink, blue and teal) and here is my card.

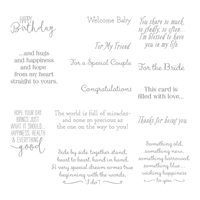
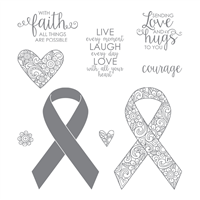
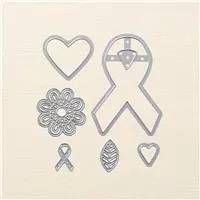
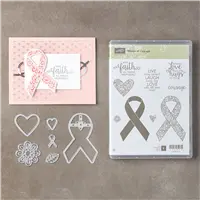
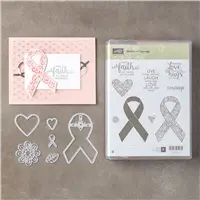
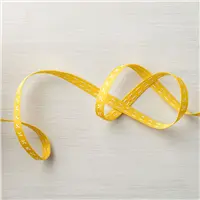
How did she do that?  It was actually very simple.  I stamped the ribbon on all three shades of card stock and then cut them into pieces leaving a little extra on each end of the top loop to attach each ribbon tail.

Here are the Stampin’ Up! supplies that I used in the design of this card, all of which can be quickly added to your shopping card by clicking on the thumbnails below:

If you have any questions on any other design aspects of this card, do not hesitate to ask.

My classmate received the card last Saturday and posted it on Facebook.  She said receiving the card in the mail “Made my day!”  That comment on Facebook made my day in return.

I have one more cancer awareness card to share with you and then I plan to move on to happier themed cards.  It may have to wait until after we return from a weekend trip with the grandson, though.  We are going spelunking at some of the natural caverns here in Texas!

In the meantime, you can help make someone’s day a little bit brighter by making and sending them a card by joining me in the #MakeACardSendACard challenge.

Thank you for stopping by today.  I hope you leave here inspired to put stamps to ink to paper.  Until next time, stamp on my friends.

Linda

Posted in Cancer Awareness, Cards | Tagged , , | Leave a comment

Ribbon of Courage in Peekaboo Peach

Cancer is such an ugly word (it should be a four letter word it is so bad).  It’s a word no one ever wants to hear mentioned when it comes to a close friend or a family member.  I personally have heard that word too many times over the past month — twice with regard to two very dear friends and once relating to one of my brothers-in-law.  It just breaks my heart when I hear that word knowing that there really isn’t much that I can do to make it all better.

The one thing that I can do, however, is make cards.  And thanks to Stampin’ Up! Million Dollar Career Sales Demonstrator Patty Bennett, who designed an amazing stamp set “Ribbon of Courage”, I have the perfect stamp set that I received as an all attendee give-away at #OnStage2017 earlier this year.

My friend and former co-worker Amy M. had previously battled uterine cancer and beat it. Sadly it appears to have returned with a vengeance.  The cancer awareness ribbon color for uterine cancer is peach.  Here is what I came up with:

Below are the Stampin’ Up! products I used in the design of this card:

I also used a strip of retired designer series paper from a recent 6 x 6 paper stack but cannot recall the name at this time (if I remember when near my supplies again I will update this post).

There is also a coordinating set of  framelits for this stamp set (and I really need to get them on an order real soon) which can be purchased separately or purchased as part of a bundle (with either a clear-mount or wood-mount stamp set) at a 10% savings when bundled:

This card is going in the mail to Amy today.  I hope it brightens her day just a little bit when she opens it — it is a hug from me to her.

Thank you for stopping by today.  I hope you leave here inspired to put stamps to ink to paper.

Until next time, stamp on my friends,

Linda

P.S.  Join me in supporting the #MakeACardSendACard campaign — all you need to do is make a hand-made card and then actually MAIL it to someone.  How easy is that!?!

Posted in Cancer Awareness, Cards | Tagged , , , | Leave a comment

Christmas in July – Oh My!

Have you ever thought about becoming a Stampin’ Up! demonstrator and having your own business?  Or maybe you just want to reap the rewards of being a demonstrator, such as attending OnStage Events, being able to get your hands on the new catalogs and pre-order new products months before the general public, or perhaps the 20%+ discount on everything you order sounds enticing?  If any of these reasons have crossed your mind, NOW is the perfect time to take action!

With their Christmas in July promotion, with your $99.00 Start Kit purchased from July 1-31, you will also receive a FREE ESSENTIALS GIFT PACK including the following items:

* The Carols of Christmas Stamp Set is an early release from the 2017 Holiday Catalog!

For just $99.00 you will receive over $125.00 worth of products and business supplies, the FREE $72.00 value essentials gift pack and FREE shipping.  Wow — now, that’s a bargain! And did I mention that your Starter Kit is 100% customizable?  This means that you select the products that you want to be in your Starter Kit.  If you need suggestions, I can help you out.

Stampin’ Up! is much more than a company with great papercrafting products.  We’re also a worldwide community dedicated to gathering with friends as we create cards, scrapbook pages, home decor items and more.

As a demonstrator you’ll earn 20-25% income / discount on everything you sell / buy; plus when you meet certain benchmarks you can also earn commissions and/or incentive trips.

I will soon be celebrating my 8th year as a demonstrator and have loved every minute of it. If you would like to “Join the Fun,” contact me to get started.

Thank you for stopping by today.  Until next time, stamp on my friends,

Linda

Posted in Promotions | Leave a comment