Painted Harvest of Patterned Pumpkins

I thought I would switch back to some Fall cards to start off the week so I could use one of the new products from my latest order – Patterned Pumpkin Thinlits Dies.  The dies are sold in a bundle with a coordinating stamp set (Pick a Pumpkin), however, I used my Painted Harvest stamp set simply for the sentiment for the front of the card as well as for the leaves that I punched out with the coordinating Leaf Punch.  Enough talk, here is today’s card for your viewing pleasure.

The particular thinlit that creates the pumpkin I used on this card makes just the “veins” that you will see on the loose pieces in the first picture.  However, I wanted my pumpkins to have guts so I used the bits and pieces that were cut out by the thinlit to fill in each alternate pumpkin.  I used liquid glue and assembled all of the pieces on scrap paper and then cut out the pumpkin with my paper snips and attached to card front with dimensionals.

The stack of logs is a design on one of the Wood Textures Designer Series Papers and I cut out a small portion and glued it to the bottom of the card front with snail.

The bow is made using the Burlap Ribbon; I separated the strands to make it easier to make a bow.

Below are the Stampin’ Up! products that I used in the design of this card, all of which can quickly be added to your shopping cart by clicking on the thumbnails:

If you should have any questions regarding any other design elements of this card, do not hesitate to contact me.

Thank you for stopping by today.  I hope you are enjoying my posts and the projects that I have been sharing with you.  My goal is that you will leave here inspired to put stamps to ink to paper.  Let me know how I am doing.

Until next time, stamp on my friends.

Linda

Posted in Cards, Holiday Catalog, Thanksgiving | Tagged , , | Leave a comment

Merry Patterns Candles on a Quilt

I have so much new stuff to play with it is really difficult for me to pick what I want to create with next.  What a dilemma!  On my last order I qualified to receive the Merry Patterns stamp set for FREE.  I have been anticipating its arrival so I selected this stamp set to be featured on today’s card.

This stamp set is photopolymer (transparent rather than the normal red rubber stamps) so that it is easy to line up your images for two-step (or in the case of the candles, four-step) stamping.  Yes, you read that correctly, there are four separate stamps that when stamped together create those candles.  I love those candles – and with just a change of the ink color, you could transform them into birthday candles or candles for any other occasion.

I used scraps of the Quilted Christmas Designer Series Paper to make the “quilt” mat on the left side of the card.  This is a great way to use up some of those left over scraps that you just can’t seem to toss in the trash (at least I can’t).

The pine boughs were stamped five times on Whisper White card stock and then fussy cut using my paper snips.  I assembled with glue dots, putting two together branch to branch straight across.  I then cut the branch off the other three and placed one on each side and the last one in the middle.  I added a small piece of washi tape from the Year of Cheer suite to cover up the rough edges and it kind of looks like a gold plate (right?).

For the tag, I cut it twice in Garden Green and offset at top and bottom.

Below are the Stampin’ Up! supplies that I used in the design of this card, all of which can be quickly added to your shopping cart by clicking on the thumbnails:

Why the silicon mat?  When I use the photopolymer stamps, I put it under my paper that I will be stamping on to get a better stamp impression.  You could also use a mouse pad.  (You’re welcome!)

If you should have any questions regarding any other design elements of this card, or if you would like to get together and make some Christmas cards, just ask.

You too can get the Merry Patterns stamp set for FREE.  Ask me how!

Thank you for stopping by today.  I hope you leave here inspired to put stamps to ink to paper.  Until next time, stamp on my friends.

Linda

Posted in Cards, Christmas, Holiday Catalog, Promotions | Tagged , , | Leave a comment

A Watercolor Christmas

Here is the blog post I wanted to share with you yesterday featuring the Watercolor Christmas project kit and coordinating stamp set.  This project kit makes it so very quick and easy to create 20 Christmas Cards (5 each of 4 designs).  All of the paper and embellishments you need are included in the kit.  The coordinating stamp set is sold separately and you will need to supply your own ink and adhesives.

I added the foil snowflake to the red card to give it a little more pizzazz.  I also had a stamp halo incident on the Season of Cheer card with the trees so I used a piece of washi tape from the Year of Cheer suite to cover it up.  (The foil snowflakes and washi tape are not included as part of the kit, but are available for purchase separately).

The only “stamping” that is required is the sentiments on the tags.  Everything else is pre-printed and precut.  Aside from the two changes I noted immediately above, the cards are assembled per the instructions with the addition of more loose sequins on each card.

Below are the Stampin’ Up! products that I used in the design of these cards, all of which can quickly be added to your shopping cart by clicking on their thumbnails:

PAPER PUMPKIN PROMOTION:

Tomorrow, September 10, is the last day to cash in on the chance to save 50% off the September Paper Pumpkin kit.  Visit paperpumkin.com and use the promo code HALFOFF0917.  I still need 4 new subscribers.  Can you help me reach my goal?

Thank you for stopping by today.  I hope you leave here inspired to put stamps to ink to paper.  Until next time, stamp on my friends.

Linda

Posted in Cards, Christmas, Holiday Catalog, Kits, Paper Pumpkin, Promotions | Tagged | Leave a comment

Christmas Quilt Suite (is Sweet!)

I absolutely love quilts.  My grandmother made me a quilt one year and it was the most cherished gift I have ever received.  When I got my first chance to review the Stampin’ Up! Holiday Catalog and saw the quilt bundle, I gasped with delight.  It did not make it onto my pre-order list; however, I just got a delivery today which included all of the fabulous products (I think all of them) from this product suite.  In light of my excitement I decided to use these products in today’s card design.

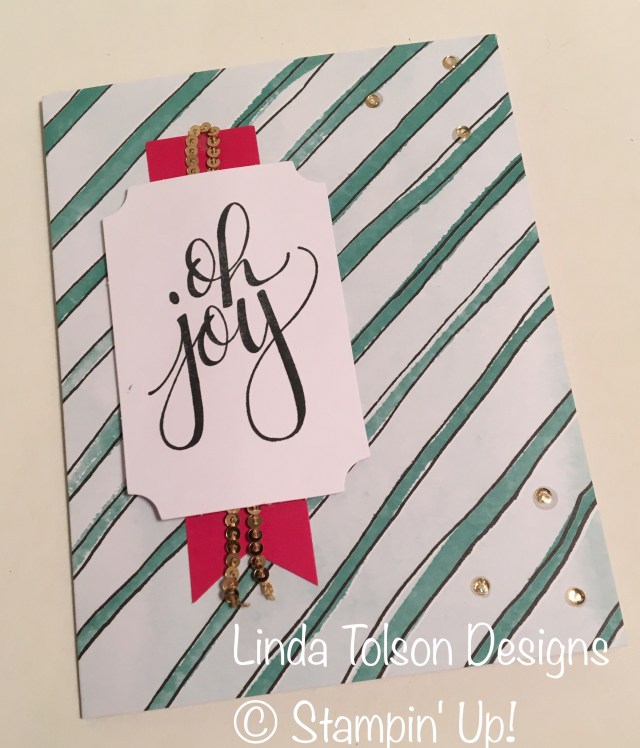
I just want to squeal like the lady on the eyeglass commercial with the owl!  I think many of my Christmas cards will be similar to this one this year.

Below are the Stampin’ Up! products that I used in the design of this card, all of which can quickly be added to your shopping card by clicking on their thumbnails:

If you have any questions regarding any of the design elements of this card, please do not hesitate to contact me.  If you would like to get together and make some of these cards with me, I would love to do that as well.

Thank you for stopping by today.  I hope you leave here inspired to put stamps to ink to paper.  Until next time, stamp on my friends.

Linda

Posted in Big Shot, Bundles, Cards, Christmas, Holiday Catalog | Tagged , , | Leave a comment

Leaf Punch Fall Wreath on Pinewood Planks

Today was a gorgeous day here in my little part of Texas.  There was a cool breeze this morning that almost made me wish I had a jacket when I was taking the dogs out for their morning potty run.  I was inspired to continue on with my Fall theme in my card design and went to work on creating a wreath using the new Leaf Punch after seeing some cards that were shared by Mary Fish.

Mary has a video on YouTube on how she made her card.  I made some modifications to her process, i.e. I cut out a circle frame to use as a form in shaping my wreath and I cut off the stems.  I also put a small piece of dimensional behind the middle petal of each leaf bundle to lift it up off the card.  I embossed my card base and lightly sponged it to bring out the texture of the embossing folder.

Below are the Stampin’ Up! supplies that I used in the design of this card, all of which can quickly be added to your shopping cart by clicking on their thumbnails:

If you should have any questions regarding any of the design elements of this card, do not hesitate to contact me.

Thank you for stopping by today.  I hope you leave here inspired to put stamps to ink to paper.  Until next time, stamp on my friends.

Linda

P.S.:  I am expecting a delivery tomorrow from Mr. Brown (a/k/a the UPS guy) with more new items from the Holiday Catalog.  Stay tuned!

Posted in Cards, Holiday Catalog, Thanksgiving | Tagged , | Leave a comment

“Spooky” Cat (Punch) and Word Words

Well I tried to create a card that I saw on a demonstrator group Facebook page.  I thought I knew how they had made their card – but I really should have gone back and looked for the original post.  Below is my attempt to create a card that was inspired by a card posted by Susan Campfield.  I will first show you my card and then explain what I should have done (and likely will try and correct with another post later this week).

I see now that Susan’s card was an “Eclipse” card – she had first stamped the large flower image from the Wood Words stamp set and then punched out the cat using the punch.  What I did was punch out the cat from a separate piece of card stock, lay it on top of the card base and then stamp the image.  The result was blank spaces around the cat cut-out.  So I will try this again later this week and hope for better results.

Here is Susan’s card:

What is an “Eclipse” card?  It is all the rage at the moment.  You basically stamp stuff on your top layer of card stock (typically would be Whisper White or Very Vanilla) and then once done you either use punches or thinlits to cut out shapes or letters to create words (i.e., the cat on this card, or “NOEL” or “JOY” on a Christmas card).  You would then layer the stamped and punched cardstock onto a colored piece of cardstock and then attach the shapes or letters that you cut out back into the spaces they came from using dimensionals so that they are raised from the card.  It is a really awesome technique and very easy.

Below are the Stampin’ Up! products that I used in the design of this card, all of which can quickly be added to your shopping cart by clicking on their thumbnails:

I have to confess that I struggled with the idea of not sharing this card with you all.  But I thought it only fair that I share my imperfections with you all as well as those cards that I feel I hit out of the park.

Thank you for stopping by today.  I hope you leave here inspired to put stamps to ink to paper.  Until next time, stamp on my friends.

Linda

Posted in Any Occassion, Cards, Holiday Catalog | Tagged , , | Leave a comment

Colorful Seasons with Seasonal Layers

Continuing on with my Fall-theme, I wanted to try a technique that I discovered yesterday on YouTube called Joseph’s Coat.  I have to give thanks to Dawn Griffith for her inspirational video using the Paisleys & Posies stamp set.  Below is my version of a card using this technique; I chose Colorful Seasons and the coordinating thinlits dies Seasonal Layers for my design.

Below are the Stampin’ Up! products that I used in the design of this card, all of which can quickly be added to your shopping card by clicking on the thumbnails.

Just what is the “Joseph’s Coat” technique or how do you do it?  Well, it is really quite simple.  Since I have not ventured into the realm of videos (yet), I will describe the steps below and advise that you can find Dawn’s video on YouTube by searching for her name and the term Joshua’s Coat.

  1. Start with a Whisper White (or Very Vanilla) piece of card stock cut to the size you want your smallest top layer to be.
  2. Select the 3-4 colors you want to use in your color scheme.
  3. Using a sponge, color random areas of the card stock (in circular shapes) until the entire area is colored.  You will want to make sure to blend your colors so that all of the white space is covered.
  4. Choose a line art image (or multiple images) that you will then stamp randomly in Versa Mark ink, sprinkle with Clear Stampin’ Emboss Powder and tap off excess.
  5. Heat emboss until all powder melts and is heat set.  Allow embossed areas to cool.
  6. Take the darkest of the colors (either Basic Black or Early Espresso work best) and a sponge brayer and coat the entire piece of card stock (including the embossed images) until it is fully covered.
  7. Take a dry paper towel or rag and wipe across the embossed areas to remove the ink that should just be sitting on top of the embossed images (also known as “emboss resist”).
  8. Mat your pieces as desired and finish out your card.  (NOTE:  I would suggest cleaning your hands before touching any other pieces of card stock as your fingers will get inky during this technique.)

If you have any questions regarding this technique or the design specifications of this card, do not hesitate to contact me.

Thank you for stopping by today.  I hope you leave here inspired to put stamps to ink to paper.  Until next time, stamp on my friends.

Linda

Posted in Cards, Holiday Catalog, Techniques, Thanksgiving | Tagged , , | Leave a comment

Painted Harvest Meets Seasonal Layers Thinlits Dies

I thought I would switch gears a bit and focus on Fall-themed cards for a while.  The Holiday Catalog from Stampin’ Up! is  more than just Christmas stamps – there are stamps and coordinating papers and embellishments for Halloween and Thanksgiving as well as for New Years.  Better yet, many of these products can be used year round with just the change of your color scheme!  How sweet is that?

For today’s card I had thoughts of Fall and falling leaves.  Here in Texas the leaves are green one day and brown and on the ground the next day.  We do not get to see much of the fall foliage that many of you up north or on the east coast get to enjoy.  So I thought a card would help capture a little bit of that wonder.

As you can see, I did very little stamping on this card.  The designer series paper and the die cuts from the Seasonal Layers Thinlits dies are my main focus in this design.

Below are the Stampin’ Up! products that I used in the design of this card, all of which can quickly be added to your shopping cart by clicking on their thumbnails:

If you have any questions regarding any of the design elements of this card, do not hesitate to contact me.

Thank you for stopping by today.  I hope you leave here inspired to put stamps to ink to paper.  Until next time, stamp on my friends.

Linda

Posted in Cards, Holiday Catalog, Thanksgiving | Tagged , | Leave a comment

Carols of Christmas & Card Front Builder Thinlits Dies

Greetings from hot and sunny Carrollton, Texas (a suburb of Dallas).  Whew, it was a hot one today – we got a little spoiled with the cooler weather the past week or so but the hot Texas heat returned as a reminder that we only have two seasons around here – Summer and Winter.

I’m sure there is someone out there who knows exactly how many days there are until Christmas; I’m not one of those people – I am never really prepared and try to send out cards every year to my friends and family.  However, I refuse to “buy” cards from a store so if I don’t start early on making my cards none go out that year.

Thankfully Stampin’ Up! comes to the rescue with their release of their Holiday Catalog in September (or in August for those of us who are demonstrators) so I can get a running start on my cards.  The hardest thing is deciding on which stamp set(s), tools and embellishments to use!

Today’s card uses three of the new products from the Holiday Catalog, and again uses the Carols of Christmas stamp set.  This time I also used the Card Front Builder Thinlits dies to create the stars and the moon at the top, as well as the deer and the trees at the bottom.  Take a look for yourself.

You can’t see it in the photo, but I added clear Wink of Stella to all of the trees and the snow scapes to give it a nice glimmer.  (I’m going to have to reorder one soon I use it so much.  Am I the only one who loves Wink of Stella?)

Below are the Stampin’ Up! products that I used in the design of this card, all of which can be quickly added to your shopping cart by clicking on the thumbnails:

PAPER PUMPKIN:Help me reach my goal of adding four (4) new subscribers by September 10 – and save 50% off your September kit if you are a first time subscriber.  Use the promo code HALFOFF0917 and be sure to select me as our demonstrator on the sign-up page!  Visit paperpumkin.com for more information.

MERRY PATTERNS HOST PROMOTION:

Hosting a holiday catalog event is always fun—and Stampin’ Up! just sweetened the deal with our exciting Merry Patterns Host Promotion. If you host a party with $300 USD in sales by October 31, you’ll earn the FREE Merry Patterns Stamp Set. This is in addition to the other hostess rewards you earn!  Check out some of these samples from the Stampin’ Up! design team:

If that’s not enough to make you say “WOW”, then check out this video:

Check out full promotion details below, then don’t wait!  Get ready to take advantage of this exciting offer today!

The Fine Print:

  • Promotion period: September 1–October 31
  • The Merry Patterns Stamp Set is exclusive to the host promotion and will not be available after October 31
  • In order to qualify, the event merchandise total must reach $300 USD (before shipping and handling)
  • There is no limit to the number of times the Merry Patterns Stamp Set may be earned, but only one set can be redeemed per qualifying order
  • Demonstrator, Customer, Workshop, and online orders qualify
  • Orders must be closed by 11:50 PM (MT) on October 31
  • The Merry Patterns Stamp Set is in addition to Stampin’ Rewards
  • The Merry Patterns Stamp Set may not be exchanged for another stamp set

Deadlines:

  • Phone: October 31, 2017 at 6:50 PM (MT)
  • Online: October 31, 2017 at 11:50 PM (MT)

If you would like to host an online workshop or a catalog party, I can create a host code for you and your friends can submit their orders online using this code to help you reach your $300 workshop sales.  Ask me how!

Thank you for stopping by today.  I hope you leave here inspired to put stamps to ink to paper.  Until next time, stamp on my friends.

Linda

Posted in Cards, Christmas, Holiday Catalog, Paper Pumpkin, Promotions | Tagged , | Leave a comment

Carols of Christmas & Merry Music

It’s a great day today!  It’s Friday; the Holiday Catalog is now open for business to all customers; I can access my blog; and I made a card today!

Today’s card uses four of the new products from the Holiday Catalog.  This layout has been floating around in my head for a day or two and it feels good to finally get it out onto paper!

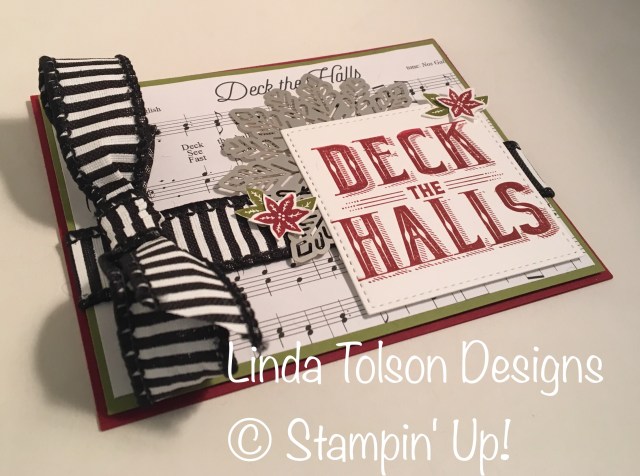
The Merry Music Specialty Designer Series Paper is uber cool!  It includes 24 sheets (4 each of 6 double sided designs) and the sheets which are “sheet music” are actual sheet music of classic Christmas Carols (fa la la la la)!

Below are the Stampin’ Up! products that I used in the design of this card, all of which can quickly be added to your shopping cart by clicking on the thumbnails:

If you have any questions about any of the design elements (i.e., measurements), do not hesitate to ask.

PAPER PUMPKIN LIMITED TIME PROMOTION:Don’t miss out on the opportunity to try out a subscription to Paper Pumpkin and save 50% off the September kit (a savings of $9.98 U.S.) if you subscribe by September 10 and use the code HALFOFF0917.  Go to paperpumpkin.com to subscribe now or contact me for more information.

PAPER PUMPKIN CHALLENGE:

Stampin’ Up! has issued a challenge for all of their demonstrators to increase their number of subscribers to Paper Pumpkin.  This challenge ends soon and coincides with the Fall into Savings promotion mentioned above.

Paper Pumpkin is a monthly subscription service with a new kit delivered to your mail box with everything you need to make cards or other paper-themed projects.  The regular price in the U.S. is $19.95 and that includes shipping.  If you subscribe now (before September 10), you save 50% off the September kit.

You can cancel at any time after you receive your September kit or you can keep your subscription on a monthly basis at $19.95 per kit.

Since it is a “kit”, it is all ready for assembly (and includes instructions) so it alleviates that “I’m not that creative or crafty” thought that may cross your mind.  Or perhaps you have a daughter, niece, aunt, sister, mother (or the male equivalents – guys like to make stuff too!) that would enjoy receiving one – these kits make great gifts.

If I can add at least four (4) new subscribers I will have met this challenge.  Who can help me reach my goal?

Thank you for stopping by today.  I hope you leave here inspired to put stamps to ink to paper.  Until next time, stamp on my friends,

Linda

Posted in Cards, Christmas, Holiday Catalog, Paper Pumpkin, Promotions | Tagged , | Leave a comment