THE COLORS ARE EVOLVING!
The spice of life is variety, and that’s especially true in the world of color. Stampin’ Up! makes a point to keep an eye on color trends across different markets and industries. When we see changes happening, we review our color spectrum to ensure that we remain consistently on top of the trends. This brings us to the 2018 Color Revamp!
In order to keep bringing you the most current and on trend colors, we decided it was time to give our color collections a makeover. With this revamp, you’ll have a new variety of shades that will inspire creativity and allow you to explore more sides of your crafting. Read on for more information!
THE DETAILS
There are still four color collections, each with ten colors. There is also a new color group called Basics (Basic Black, Very Vanilla and Whisper White). In order to keep our color collections to exclusive Stampin’ Up! colors, we moved Basic Black, Very Vanilla, and Whisper White out of the Neutrals collection. We’ve also moved a few colors into the Neutrals collection, making it more exciting and colorful!
Some additional colors have changed collections as well—you’ll notice this as you look through the new collections below. These changes were based on needing to maintain color balance in our updated collections. For example, Poppy Parade is now the brightest red so it is part of the Brights collection.
IN COLORS
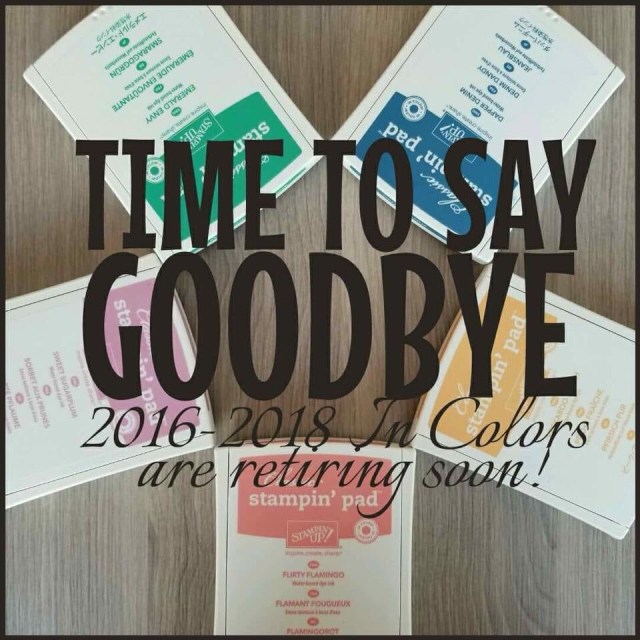
There are no changes to the In Color program. Every two years we will continue to introduce five new In Colors that will be available for the ensuing two years.
We also have previous In Colors that are returning and joining our core colors:
- Mossy Meadow
- Poppy Parade
- Flirty Flamingo
- Coastal Cabana
- Mint Macaron
- Blackberry Bliss
Without further ado, meet the new and revamped color collections:
IN COLORS:
 NEW COLORS:
NEW COLOR COLLECTIONS:
NEW CLASSIC STAMPIN’ PADS
In addition to new colors, we also redesigned our ink pads. The case is a new, more intuitive design and we’ve improved the formula of the ink, as well!
I can explain this in more detail if you are really interested, but all you really need to know or care about is that they are better and will still fit into your current ink pad storage unit of choice.
As you can imagine, the 2018-2019 Annual Catalog is chock full of surprises. Copies will become available for release to you, my friends, by mid-May. If you would like to receive a catalog from me, just ask for one and leave me a private message with your address if I don’t already have it.
I am expecting my Product Purchase Premier items to be delivered today by Mr. Brown (a/k/a UPS) so I will have more Stampin’ Up! products in my downstairs area to play with while I continue to recover from my broken ankle. This means I should have something to share with you soon.
Thank you for stopping by today. Until next time, stamp on my friends.
Linda
Like this:
Like Loading...


 I previously shared with you the lists of retiring products from the Occasions and 2017-2018 Annual Catalog. I thought it would be more fun to shop if you could look at thumbnails of the actual products. Stampin’ Up! to the rescue with their sub-categories of products in the online store!


 So to get to my point, if you have this bundle of products on your Wish List, buy them before May 31 to take advantage of the 10% bundle discount!


 I need to work on my “blending” technique a bit more as I could never get the look I was going for and then after working on so many of the butterflies (I needed 30 swaps) my Daffodil Delight blends were nearly bone dry! Oh the agony! (I blame my right ankle for this one – lol.)