
Hello my friends. I hope you have had an enjoyable Memorial Day weekend so far. I had one of my IGA infusions a week ago Friday and was down and out for a week afterwards so I am taking it easy this weekend. (Very frustrating when I had zero side effects after the one prior. One step forward, two steps back.)
I finally felt up to doing something creative by Friday evening and started working on a shadow box project to celebrate the birth of an adorable baby girl by my infusion nurse, Ariellen. She was placed on bed rest during the last few months of her pregnancy and she spent a lot of that time following the live feed of April the giraffe in anticipation of seeing the birth of her baby giraffe. This experience influenced a “jungle theme” for the nursery, with lots of giraffes.
Well, I wanted to make a wall hanging that would fit in with the theme, but I didn’t have any giraffe stamps so I went to Pinterest to see what I could make using punch art. I am always amazed by the creativity of my fellow crafters. My giraffe was inspired by a combination of projects that I saw (credit given below). And here is my punch art giraffe:

 I used several retired products and tools to get the look that I wanted, as well as some that are retiring as of May 31, 2017. Here is a list of what I used to create this project:
- Sweet Pea Designer Series Paper (Item #117161 – retired)
- Ovals Collection Framelits (Item #129381 – retired)
- Word Bubbles Framelits (Item #132968 – retired)
- Little Letters Thinlits (Item #133730 – retired)
- 2-1/2″ Circle Punch (Item #120906 – retired)
- Large Oval Punch (Item #119855 – retired)
- Basic Pearl Jewels (Item #119247 – retired)
- Glimmer Paper Assortment Pack (Item #143831 – retired)
- 12 x 12 Shadow Box (not sold by Stampin’ Up!)


Inspired by: Baby Giraffe card by Lisa Fisher (May 2, 2o11); and Giraffe card for Alex by irishgreensue on splitcoaststampers.com.
If you want to try and create a similar punch art giraffe, here are the punches that I used for each of the body parts:
Head: Owl Builder Punch – body without feet.
Eyes: Owl Builder Punch – whites: the two medium size circles that are above the body on the punch; pupils: the two smallest circles that are on the far side of the punch beneath the “vest” or “chest” piece.
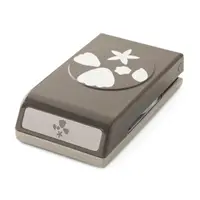
Ears: Blossom Builder Punch: leaf x 2 in So Saffron and Soft Suede. Cut down the Soft Suede as shown. I attached So Saffron to back of Owl ear and Soft Suede on front on top of Owl ear.
Nostrils: Owl Builder Punch – the two medium size circles that are above the body on the punch.
Mouth: Blossom Builder Punch – the leaf; Owl Builder Punch – medium size circle for the tongue.
Antlers: Free hand; Owl Builder Punch – medium size circles.
Neck: Free hand; Owl Builder Punch – medium size circles; 1/2″ Circle Punch.
Body: Oval Framelit.
Tail: Free hand.
Legs & Hoofs: Free hand; 1/2″ Circle Punch, cut in half.
Sun & Rays: 2-1/2″ Circle Punch; Blossom Builder Punch – 2 petals from the 5-petal flower.
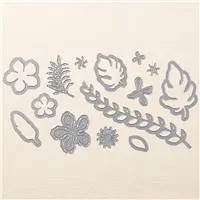
Clouds: Word Bubbles Framelits – overlaid Whisper White with vellum to mute color.
Flowers: Succulent Framelits – blue and orange flower; Botanical Builder Framelits – pink flower.
I had originally attempted to sponge in some Soft Sky at the top but did not like how it turned out, so instead of overlaid some light blue designer series paper to represent the sky. All in all I am happy with how this turned out — not too bad for my first punch art animal.
Thanks for stopping by. I hope you leave here inspired to create your own punch art. Until next time, stamp on my friends.
Linda


